Montag, 4. Juli 2016

Sitting on the Edge SANTA CLAUS


Sitting on the Edge SANTA CLAUS
This is a sitting on the edge Santa Claus. It is very simple to sew. The size of my pattern is variable, so you can sew it smaller or bigger.
You can make him with felt or paper and instead of sewing , you can glue the pieces with your kids.
On one side of the coat you can sew a little pocket, for a money present . You can give him legs. Or what you want. It’s a nice Christmas decoration.


Material:
Red Cotton
White Cotton (little piece)
Rough white Cotton for the beard
2 Buttons for the Eyes or something other
Maybe a little pompon or bell for the hat
Filling material


The Pattern:
Pattern pdf
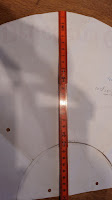
You need two Triangles, both have the same size.
Please work two Triangles by the instructions you see on the pictures. Transfer it on a cardboard.
One of them is for the 3 triangles for the solid sides of the Santa.
Before you cut it out, draw a seam allowance of 0,5cm to the triangle.

The second triangle:
Cut out the different pieces. The coat and the beard have the same sizes. This pieces need  +seam allowance!!!!


Work:
Cut out:
- Red Fabric: The big triangle 3 pieces for the sides and the bottom
  Think of the seam allowance!!!
- Red Fabric: The pattern for the hat, and 2 x for the coat
- Rough fabric: the beard
- White fabric: the eyepiece


Sew
Sew the coat and the beard together
Sew the hat and the eyepiece together
Sew the top and the lower part together
Now the front side is ready!


Sew the red triangles on the sides of the front and close it on the back to a pyramid.


The last solid triangle is for the bottom. You can fix it with pins and sew.
Let a part of 3 cm open!


Pull it on the right side and fill it with your filling material


Close the open seam- sew by hand


Now you can glue eyes or stitch it, or sew little buttons.
On the hat you can fix a pompom or bell.
Ready!!!


Extras:

Pocket: -  Cut out a 4x6cm piece of fabric
-          Iron the seam allowance on the small side ca 0,5cm
-          Iron the seam allowance on the  both length sides ca 0,5cm
-          Sew the both length sides on the front of the Santa

Legs:      - you can take cord or other materials like felt or a rope ca 2x  15 cm
               - Beads for the feet

               - sew the feet on the base side of the front, sew the base triangle like the description  above         

Montag, 13. Juni 2016

BURLAP - UTENSILO – Simple and fast to sew


BURLAP - UTENSILO – Simple and fast to sew

This is a tutorial for a very simple but nice Utensilo.
I sew it from the material of an old Coffee Bean Bag. But you can use every other fabrics.


Material:
2 fabrics
4 buttons,
Thread
I use 3 fabrics, because the burlap is very instable. I cut out a piece of cotton and sew it on the back side of the burlap.

If you use only lightweight fabrics, stabilize with Bondaweb- Vliseline


Work:
Cut out a square of fabrics.
I cut out a 30x30cm square. But you can use every other size.
All fabric squares get the same size.


Sew:
I sew the light cotton on the back side of the burlap.
Then lay the burlap and the checkered fabric  right side on right side.


   Sew around, but don’t  forget  to let a piece of 5 cm open.                                                                                                                                                                                                                                                                                                                                                                                                                                                                                                                                                                                                                                                                                                    
Cut off a triangle on the four corners.                                                                                                                                                                                                                                                                                                                                                                                                                                                                                                                                                                                                                        


Turn the inside through the opening .
Fold the fabric on the open side carefully inwards. Iron the square.
Sew around with a distance of ca 0,75 cm.                                                                                                                                                                                                                                                                                                                                                                                                                                                                                                                                                                                                                                                                                                                                                                                                                                                                                                                                                                                                                      
Folding:
Mark the middle of each side
Then from the middle 6 cm on each side.
                                                                                                                                                                                                                                                                                                                                                                                                                                                                                                                                                                                                                                                                                                                                                                                                                                                                                                                                                                       
Take the top and add the two 6cm markings on the corner inward together.
Sew this point together.                                                                                                                                                                                                                                                                                                                                                                                                                                                                                                                                                                                                                                                                                                                                                                                                                                                                                                                                                                                                                                                      
Do this on the four corners.
                                                                                                                                                                                                                                                                                                                                                                                                                                                                                                                                                                                                                                                                                                                                                                                                                                                                                                                                                                                                                                                                                                                                                                                                                                                                                                 
 Take the corner and pull it outside over the edge.


Fasten the corner with a button.


Ready!!!!


Samstag, 9. Januar 2016

Körnermaus


Zum Herstellen einer Körnermaus benötigt man:

zwei verschiedene Baumwollstoffe,
zwei kleine Knöpfchen oder Perlen für die Augen
Schrägband oder Nahtband für den Schwanz  
circa 30 cm
Füllmaterial ca 800g

Vliesofix

und natürlich das Schnittmuster:   Maus groß
                                                                                   Maus klein


Als Füllmaterial verwende ich diesmal Traubenkerne. Bisher habe ich immer Dinkelkörner oder Kirschkerne benutzt, wollte aber diesmal etwas anderes ausprobieren.

Ich hatte die Wahl zwischen Rapsamen und Traubenkernen. Rapssamen sollen die Wärme oder Kälte am längsten halten.  Nachteile von aber  sein, dass er beim Erwärmen den typischen Rapsgeruch abgibt.  Da ich eine Maus verschenken möchte, habe ich mich für die Traubenkerne entschieden.


Die Körnermaus  habe ich bereits mehrfach genäht. Die vorgeschlagene Größe eignet sich gut für Erwachsene oder Schulkinder. Am Ende werde ich noch eine Größe angeben, die für Babies und Kleinkinder geeignet ist.


Zuschneiden:
Rundherum eine Nahtzugabe von 1,5 cm berücksichtigen.
Das Hauptteil besteht aus einem Halbkreis von 60 cm  Durchmesser. Er wird einmal zugeschnitten.
Der Kopf ist ebenfalls ein Halbkreis von 16cm Durchmesser. Er wird einmal zugeschnitten.
Für die Ohren benötigt man 4 Halbkreise mit 8 cm Durchmesser.

Das Vliesofix in der Größe des Kopfteiles ohne Nahtzugabe zuschneiden und aufbügeln.


Nähen:
Das Teil für den Kopf  an der runden Seite entlang der Kante abschneiden.
Für die Ohren jeweils zwei Teile rechts auf rechts zusammen legen und an den runden Seiten
zusammennähen. Die Nahtzugabe auf circa 0,75 Zentimeter kürzen und kleine Dreiecke einschneiden. Die Ohren auf rechts drehen. Die Ohren an der unteren Seite von aussen in eine Falte legen.

Das Kopfteil auf das Hauptteil legen. Die Ohren zwischen dem Körperteil und dem Kopfteil schieben, jeweils ca 1cm von der Mitte.
Nun mit dem Bügeleisen das Kopfteil auf dem Körperteil fixieren auch die Ohren direkt mit bügeln.

Auf der Nähmaschine Eine Applikationsstich oder einen engen ZickZackstiche einstellen. Ich habe einen Stich in der Größe 0,5  2,5 mm gewählt.

Nun das Kopfteil mit den Körperteil durch den Zickzackstich verbinden,  dabei die Ohren mit einfassen. Das Schrägband beziehungsweise Nahtband durch einen Geradstich zusammennähen.

Die kurze Seite des Halbkreises rechts auf rechts zusammenlegen und nähen. Es ist nun ein Viertelkreis geworden,
Das Körperteil so zusammenlegen dass die Naht und die Mitte übereinander liegen, dort den Schwanz einschieben. Die untere Seite zusammennähen, dabei eine kleine Öffnung von etwa fünf Zentimeter zum Wenden und Füllen lassen.


Die Maus durch die Öffnung auf die rechte Seite ziehen.  Man kann schon sehr gut erkennen, dass wir eine Maus vor uns haben. Nun kann man ausprobieren, wo die Augen - Knöpfe am besten hingehören und dort fest nähen.


Die Körner einfüllen und die Öffnung zunähen.


Fertig ist die Körnermaus.